/Daily emails

Aligned text will create a sense of organization

Alignment

The various forms of alignment, left, right and centered, are useful ways to give your slide a feel of organization.

Left alignment suggests the strongest sense of structure. It is what we are most accustomed to and it gives the eye the feeling that there is a fixed beginning to the text. Left aligned text is easiest to read — especially in lengthy blocks.

Right alignment is often used when a piece of text is placed against an element immediately to its right or when placed against the right margin. It is a bolder look and a little less organized. Right alignment can be more difficult to read if used for more than just a few large lines.

Centered alignment can look elegant (as in a menu or invitation) but it creates the least amount of structure. It establishes weak lines of alignment for other elements on the slide as well.

Some tips:

[list style=”orb” color=”blue”]
  • Align your text to other elements, to the imaginary margins or to the center line of the slide.
  • Align tops and/or bottoms of elements to each other if possible.
  • The more your text is aligned to other elements and text the more structured your slide will appear to your audience.
  • Be careful about mixing alignments on a slide. It can be done but there should be one dominant choice.
[/list]

Don’t just throw text and images on a slide. A little effort at alignment will convey the sense that you are organized and prepared (maybe even if you are not).

Next week: An important reason to break the alignment rule.


By |2018-12-07T19:39:09+00:00October 15th, 2016|Daily emails|Comments Off on Aligned text will create a sense of organization

The glow of the season

holiday-glow

One of my favorite go-to tricks for making text stand out from a complex background is to apply a glow that will separate it from the layer below. It is a fairly straightforward procedure that goes like this:

For text against a busy background:

  1. Select the text, place your cursor in the text as though you were going to edit and then press Control + A to select all the text.
  2. From the top menu select Format > Text Effects > Glow
  3. The flyout menu shows a variety of standard glow presets you can use. I usually go right to the bottom: Glow Options
  4. A panel will appear at the right with custom glow options. The first will be Presets and will show you all the standard presets you had in the previous flyout.
  5. In the next selection, Color, you will be able to specify the color of the glow. In the example above I selected a bright orange. Perhaps 90% of the time I will choose white.
  6. Play around with different values in the two remaining selections: Size (I selected 45 pt) and Transparency (I left it at 0%) to get the effect that works best for your situation.

Cool, huh? Enjoy the glow!

By |2018-12-07T19:39:10+00:00October 9th, 2016|Daily emails|Comments Off on The glow of the season

I know you can’t read this but…

I know you can't read this but...

The most profound words crammed into a screen with a few hundred others become lifeless and impotent. They frustrate and annoy our audiences. When read from the screen to our listeners they become the fuel for the universally recited, number one complaint: “I hate it when they turn and read the slides to us!”

No wonder PowerPoint is so reviled.

If you ever find yourself saying, “I know you can’t read this but…” that is an indication that you are committing the most grievous of errors: too much text. Stop it. Edit. Divide your slides up. Use only keywords. But, whatever, stop putting so many words on the screen. Because no communication is happening.

We might as well all go home.

By |2018-12-07T19:39:10+00:00October 1st, 2016|Daily emails|Comments Off on I know you can’t read this but…

Use a build to reveal content when you are ready

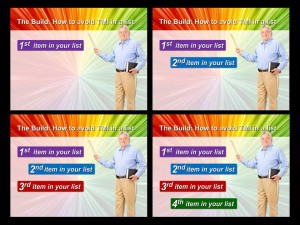
Build

A “build” is a slide or series of slides the shows items on a list one by one. Each new item is usually placed below the previous item so that the presenter can focus the audience’s attention on the content he or she wishes to address at that moment. Using a build reduces the distraction of having more information on the screen than the presenter is actually discussing. And when finished, it shows all of the related list of information together.

It is one part of a solution as to what to do with a list, especially a bulleted list, so as to not overload your audience with too much content. Another part of that solution is to only use keywords and avoid full sentences in your list.

These two concepts together, using a build and using only keywords, can help tame some of those horrible bullet lists we have all come to hate.

By |2018-12-07T19:39:10+00:00September 24th, 2016|Daily emails|Comments Off on Use a build to reveal content when you are ready

5 steps to fix your PowerPoint: Step 5 – Rehearse

Practice, practice, practice

“An amateur practices until he can do a thing right, a professional until he can’t do it wrong.”

The above quote, variously ascribed, says it quite nicely: practice, practice and then practice some more. It is the secret to a great presentation — but when there is PowerPoint involved, it becomes crucial. It helps you know your material, know your transitions, and build your confidence.

Rehearsal shows opportunities for editing and improving. I find practice opens the door to including humor, discovering connections and adding deeper insights. It is almost impossible to over-rehearse.

Try various methods: use audio and/or video recording, perform in-front of a mirror, on a walk or just with your dog as an audience, or with a trusted, but fair, friend.  I find setting up a video camera, recording and then viewing to be a most powerful, if somewhat uncomfortable, tool. It is also important that you speak your material out loud — don’t just run through it in your mind as you advance the slides.

Take advantage of the professional’s secret weapon: practice, practice and then practice some more. Put in the work — it will be worth it.

By |2018-12-07T19:39:10+00:00September 15th, 2016|Daily emails|Comments Off on 5 steps to fix your PowerPoint: Step 5 – Rehearse